The Cricut Design setup is a cakewalk. Don’t you think so? It’s okay; I know you might be a beginner crafter who wants to get started with a new Cricut machine. But you need to know that setting up is really not as daunting as it seems to be. First of all, clear these things from your mind that you are a beginner and don’t know how to setup Cricut.
Cricut Design Space is software that is used to setup your Cricut machine. However, the main purpose of the Cricut app is to design and edit them on your device and then cut those designs with your Cricut machine. So what are you waiting for? Let’s delve into this blog and start your Cricut setup hassle-free.
What Do You Need for Cricut Design Setup?
When it comes to setting up a Cricut machine, you will need many things, such as a compatible device, Cricut software, and Cricut ID. The software plays an important role in setting up the machine. Besides, Cricut only supports four types of operating systems, like Windows 10 or 11, macOS 11 or later, Android 10.0 later, and iOS 15 or later. Below, I have mentioned the prerequisites you need to ensure before the setup.
1. A Compatible Device
Here are the system needs you will want on your MacBook for Cricut setup:
- Operating System – macOS 11 or later
- CPU – 1.83 GHz
- RAM – Minimum 4 GB
- Display – Minimum 1024px x 768px screen resolution
- A USB port or Bluetooth is required
- Disk – 2 GB
Now that you know what you will need to look for when you decide on your system for Cricut Design setup.
2. Cricut Design Space
Here’s how to download the Cricut software on your Mac:
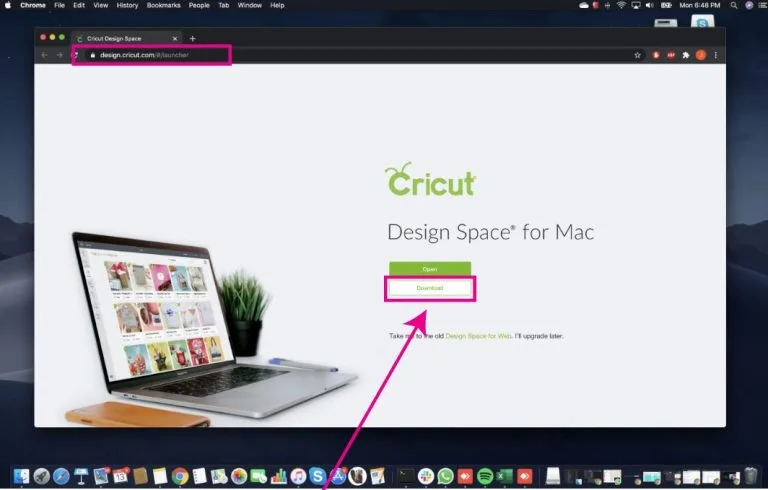
- On your Mac, open any browser that you often use.
- Go to the browser search bar, enter design.cricut.com, and click on the Enter button.
- You have to hit the checkbox to accept Cricut Terms of Use. Once you have accepted it, you will need to click on the Download tab.
- Then, choose the folder where you want to save your downloaded file. However, by default, it will be saved to your Downloads folder.
- Once you have downloaded the software, you need to install it.
- To install the Cricut Design Space on Mac, go to the folder where you saved your downloaded file. I saved it in the Downloads folder, so I’ll install it from there.
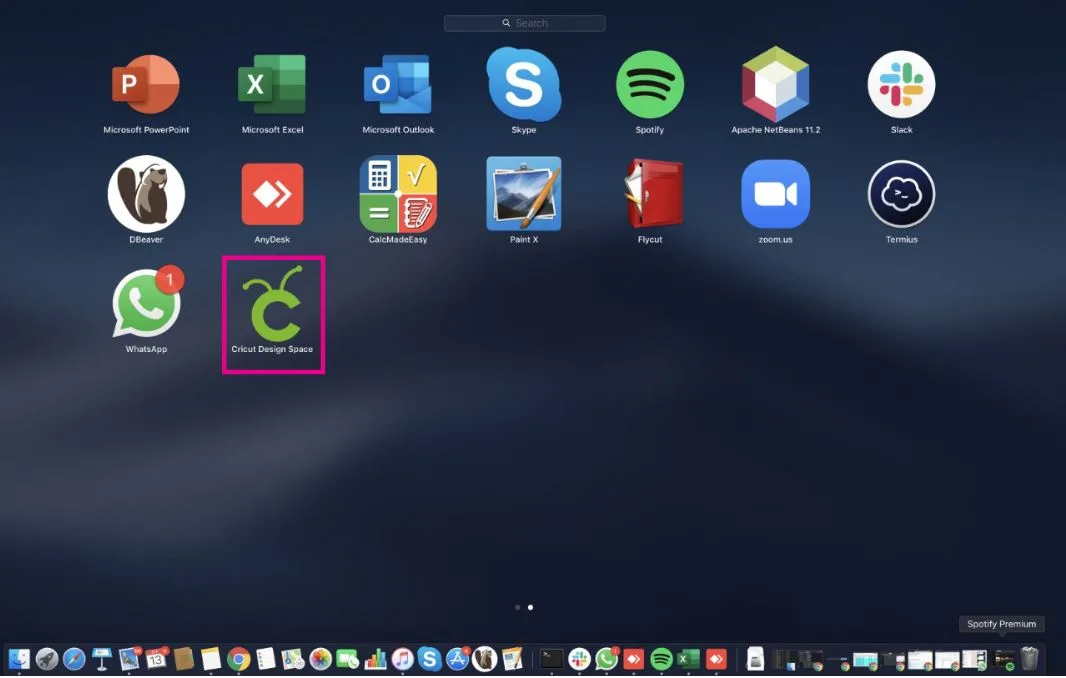
- Next, click twice on the downloaded file to open it.
- Once it is opened, a new window will open. Just try to drag the Cricut icon to the Applications folder.
- After that, the Cricut Design app will be installed successfully.
3. Cricut Account ID
Before you learn about the Cricut Design setup, you must create a Cricut account. Here’s how to create an account using the Cricut app:
- Open a browser on your Mac computer.
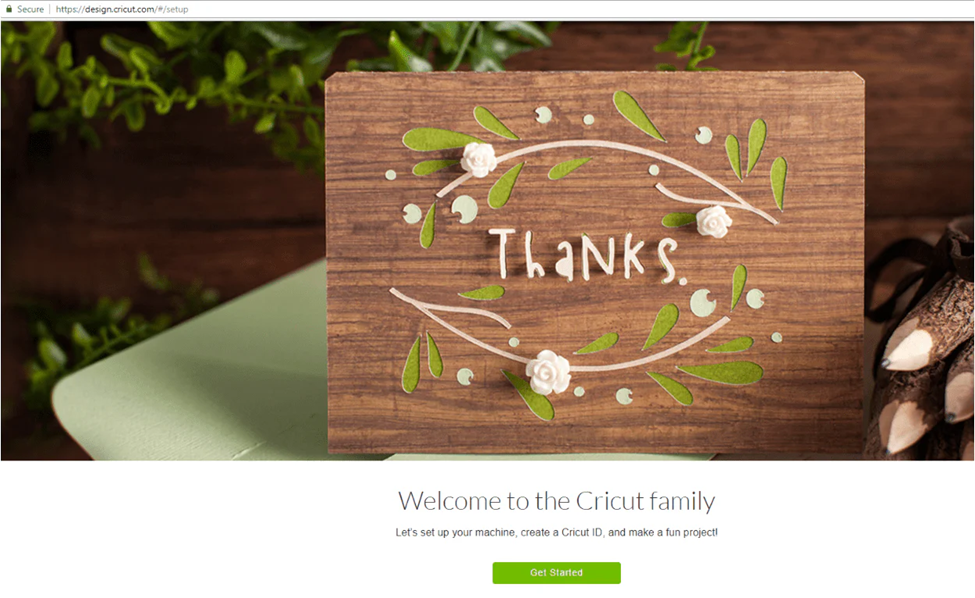
- Then, visit the URL design.cricut.com/setup.
- After that, you will need to click the Get Started button.
- Fill in your details, such as first and last name, and include your email address.
- Then, select your country and read the Cricut terms of use.
- Afterward, select the checkbox and hit the Create User ID tab.
- Finally, an Updated Policies pop-up window will appear. To proceed, click the Accept button.
After completing these prerequisites, you can move further to the next section, where I will explain how to perform the Cricut Design setup.
How to Setup Cricut Machine?
Now that you have everything you need to setup your Cricut product, you need to start with your Mac and set it up. Follow the steps given below to setup your Cricut.
- Open Cricut Design Space and click on Product Setup.
- Then, you have to select the option: Smart Cutting Machine.
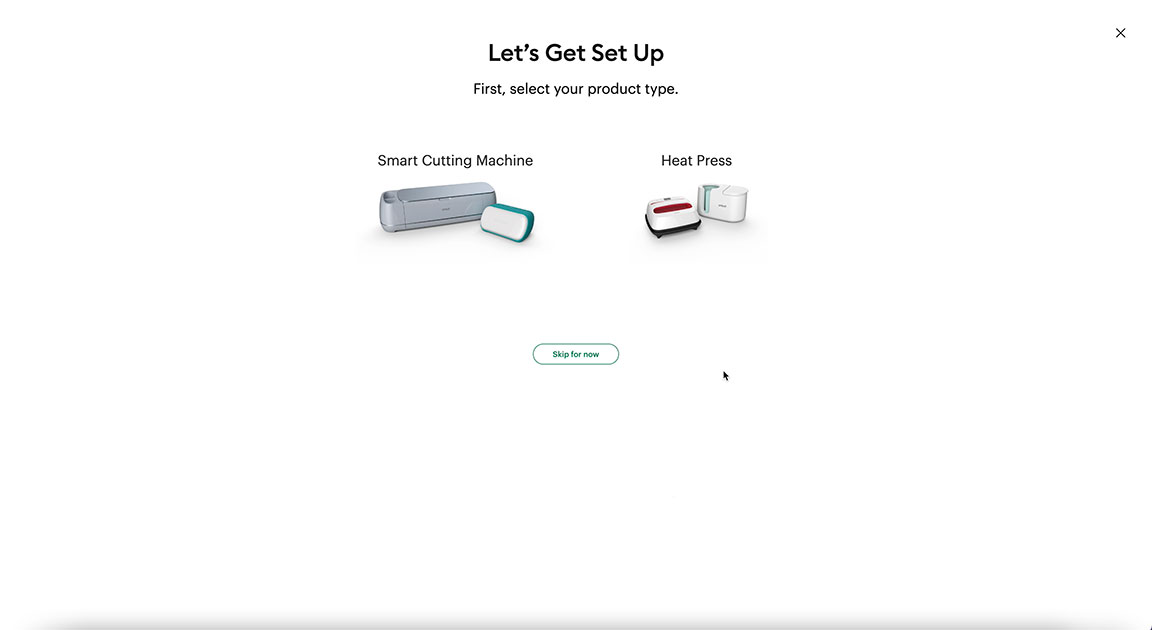
- Once done, click on the type of Cricut model that you are using.
- For example, if you are setting up a Cricut Maker, you have to select the same from the given options on the screen.
After that, you need to connect your Cricut to your Mac. Follow the steps in the next section, which explains how to connect Cricut to Mac.
How to Connect Cricut Machine to Mac?
Let’s now connect our Cricut machine to a Mac device. The steps will be simple enough for beginners to follow and connect themselves. Here’s how to connect:
- Confirm if your computer is on or off.
- Once you have powered on the system, you will need to locate your Mac and Cricut with a gap of 10 to 15 feet.
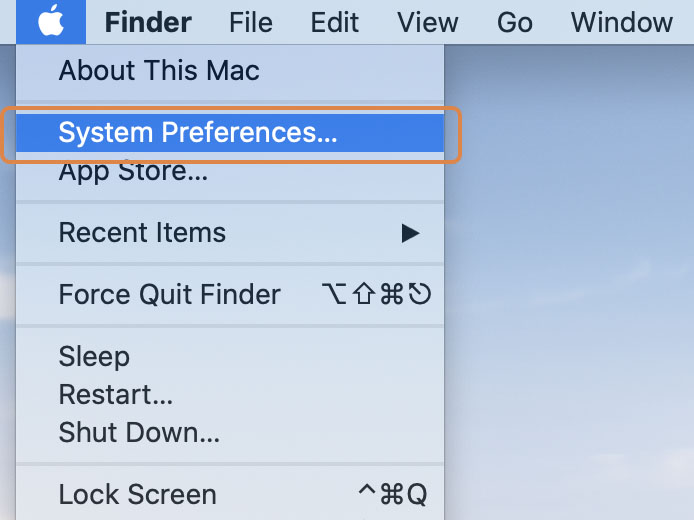
- Now, move ahead to your Mac and select the Apple menu.
- Then, choose the System Preferences option.
- Here, you must select the Bluetooth option on your Mac computer.

- Once your Bluetooth is on, look for the Cricut machine.
- Once found, select it and click the Pair tab.
Finally, you have done the Cricut Design setup; now, you are all set to start your crafting journey hassle-free.
FAQs
Question 1: Can I connect my Cricut via a USB cable?
Answer: Yes, you can connect your Cricut using your USB cable. However, you can not connect your Cricut Joy via USB cable because the Joy model doesn’t come with a USB port built-in. So, you will need to connect it wirelessly. Besides, all the models are easily connectable via a USB cord.
Question 2: Is Cricut software enough for Cricut Design setup?
Answer: Yes, Cricut Design Space is enough. But still, you will need to ensure other factors, such as your system’s requirements. Systems with the latest operating system are more likely to support the Cricut software, making your machine setup easy and seamless. Although Cricut software will be enough, you must check the other factors as well.
Question 3: How can I setup Cricut product?
Answer: Here are some tips for setting up a Cricut more quickly:
- Use the Cricut software on a compatible device. Try to set it up on a device with the latest operating system.
- Make enough space in front of and behind your Cricut machine.
- Connect Cricut via a USB cable as it is faster than a Bluetooth connection.